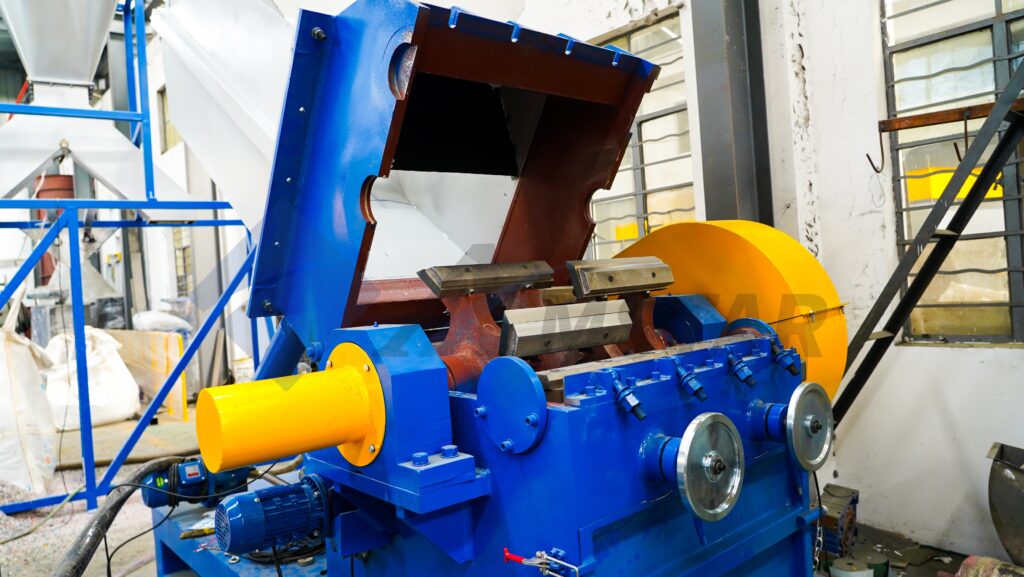
Proper maintenance is essential to ensure the longevity and efficient operation of the SWHB1000 Granulator. This guide outlines the detailed steps for replacing the rotary and static blades, ensuring safe and effective replacement with minimal downtime. Follow the steps carefully and refer to the accompanying diagrams and images for visual guidance.
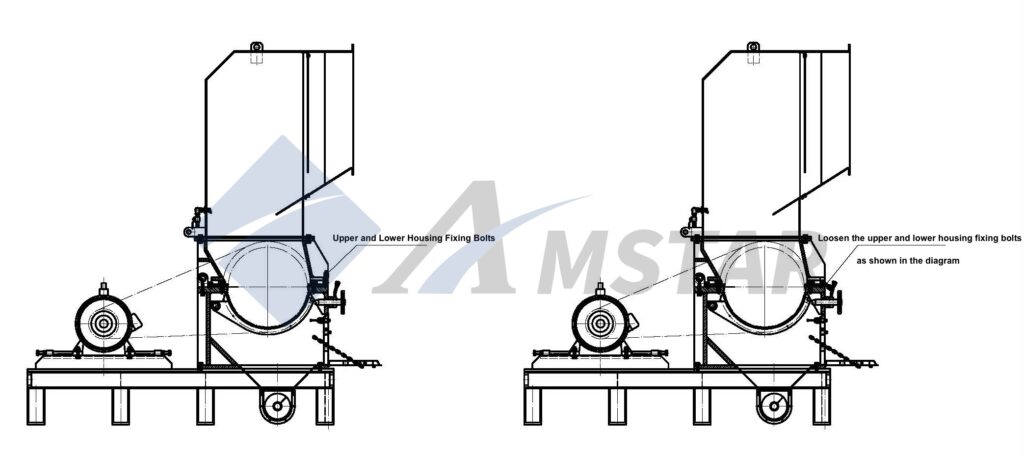
1. Loosen Upper and Lower Housing Fixing Bolts
Before beginning the blade replacement, ensure that the Granulator is safely powered off.
Action: Loosen the upper and lower housing fixing bolts using the appropriate tools, as indicated in the diagram. This will allow access to the Granulator chamber.
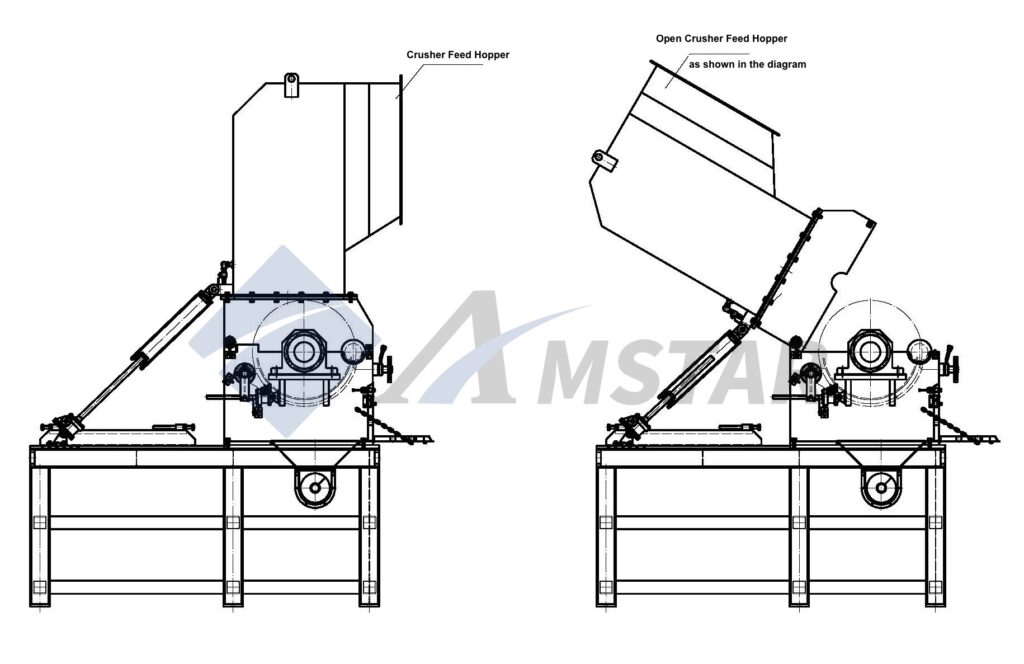
2. Open Granulator Feed Hopper
The next step involves accessing the blades inside the Granulator.
Action:
- Set the manual/automatic switch on the electric box door to the manual position.
- Press the opening button to begin opening the feed hopper. The hopper should open to approximately 60% of its full range.
- At this position, the static and rotary blade bolts inside the Granulator chamber will be visible and accessible for removal.
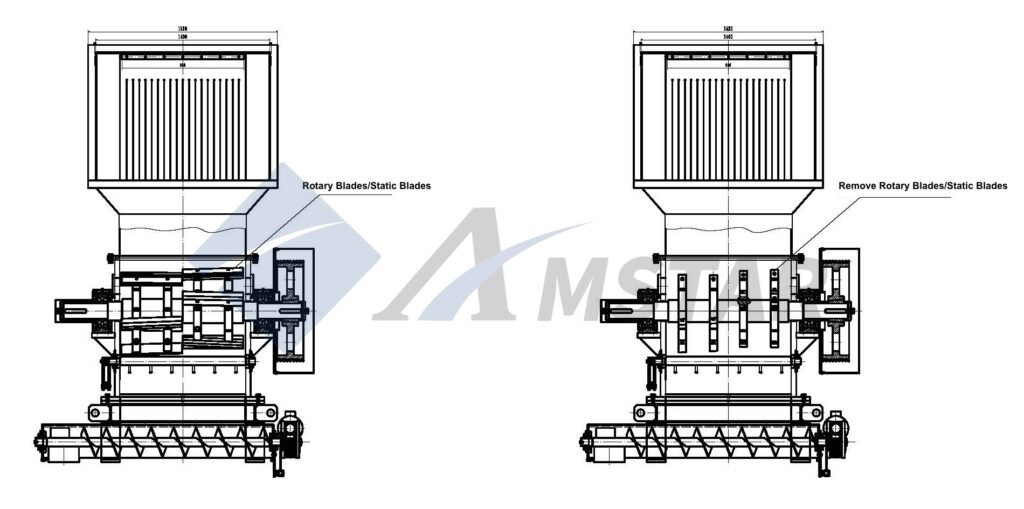

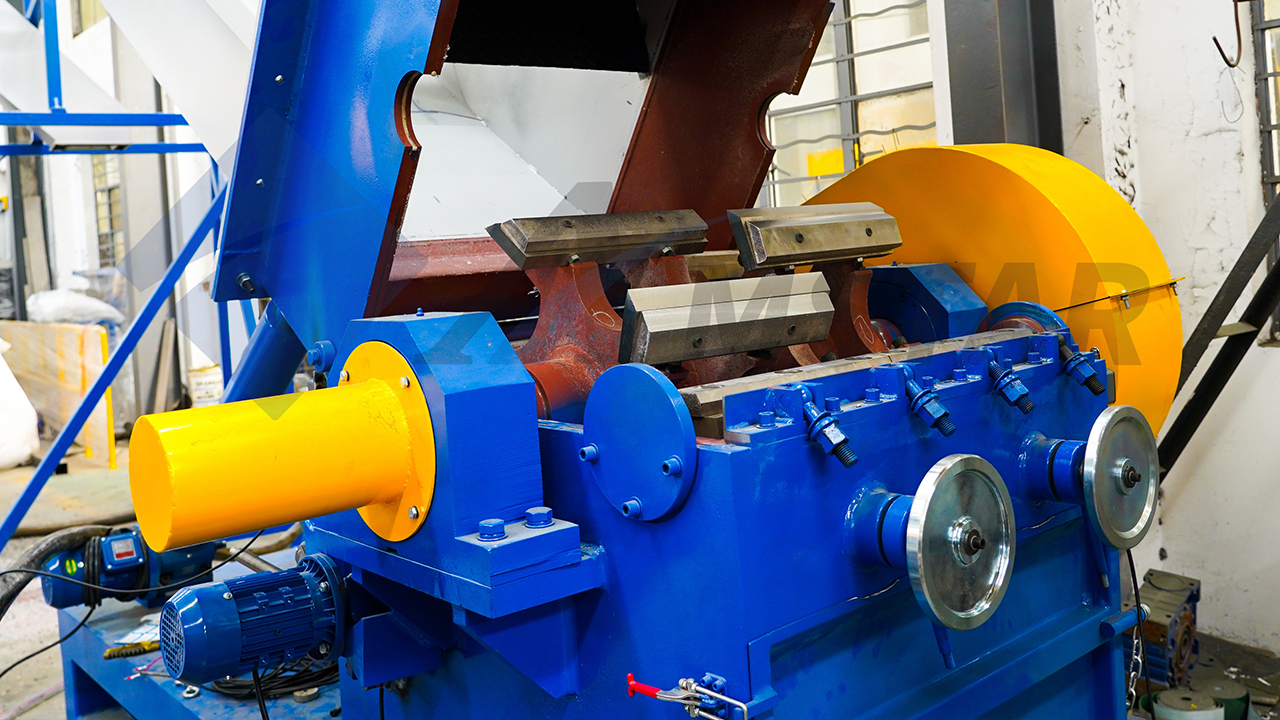
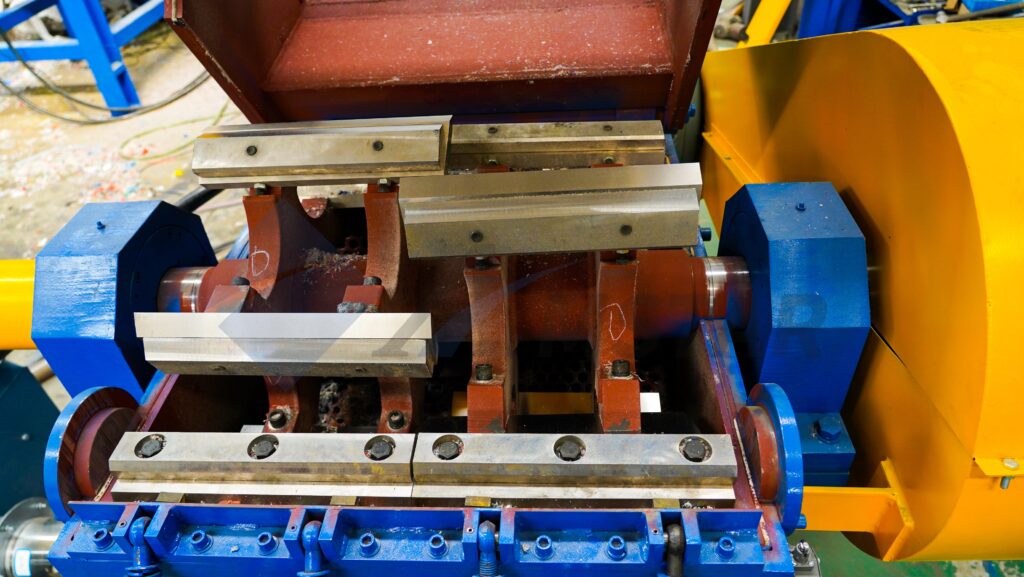
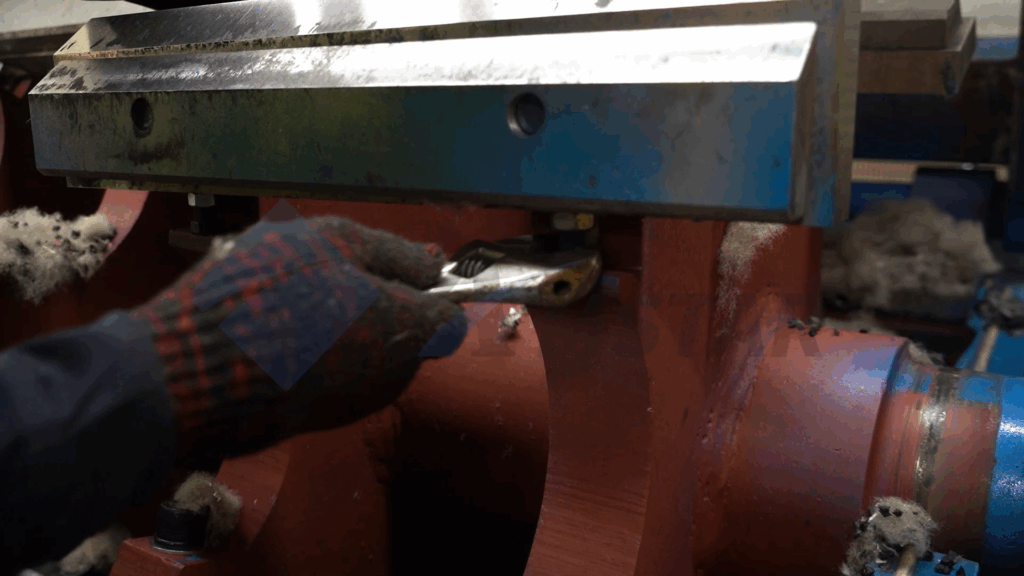
3. Remove Rotary Blades/Static Blades
With the hopper open and the Granulator powered off, it’s time to remove the old blades.
Action:
- Power Off: Turn off the circuit breaker inside the electric box and hang up a maintenance sign to ensure the machine remains without power during maintenance.
- Blade Removal: Use a 17mm internal hex wrench to remove the rotary blade bolts. Use a 27mm external hex socket wrench to remove the static blade bolts.
- Details: There are 10 rotary blades and 20 sets of bolts, as well as 4 static blades with 16 sets of screws.
- After removal, inspect the screws and washers for any signs of damage. Replace any damaged parts with new ones to ensure secure installation.
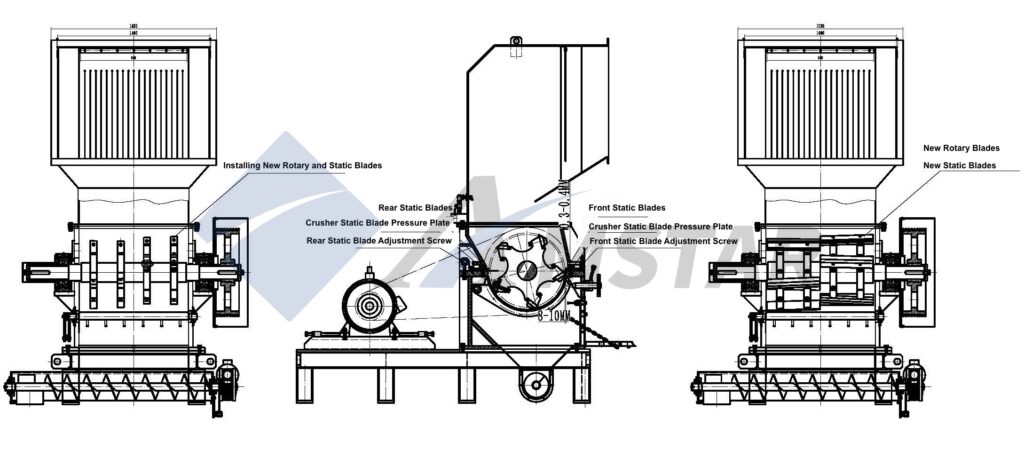
4. Installing New Rotary and Static Blades
The installation of new blades is a critical process. Proper alignment and torque are essential to achieve optimal performance.
Action:
- Step 1: Install the two front static blades and pressure plates first. Ensure the protruding size of the blades is set to 8-10mm. Tighten the screws with a torque of 480 N·m and secure the adjustment screws.
- Step 2: Fix all rotary blades and pressure plates. Use the rotary blade adjustment screws to set the gap between the rotary blade and the front row of static blades to 0.3-0.4mm. After adjustment, tighten the rotary blade screws with a torque of 576 N·m and secure all rotary blade adjustment screws.
- Step 3: Install the two rear static blades and pressure plates, adjusting the gap between the rotary and rear static blades to 0.3-0.4mm. Tighten all rear static blade screws with a torque of 480 N·m and secure the rear static blade adjustment screws.
- Step 4: After installing and adjusting the blades, recheck the tightness of all screws to ensure that there are no missing or loose bolts.
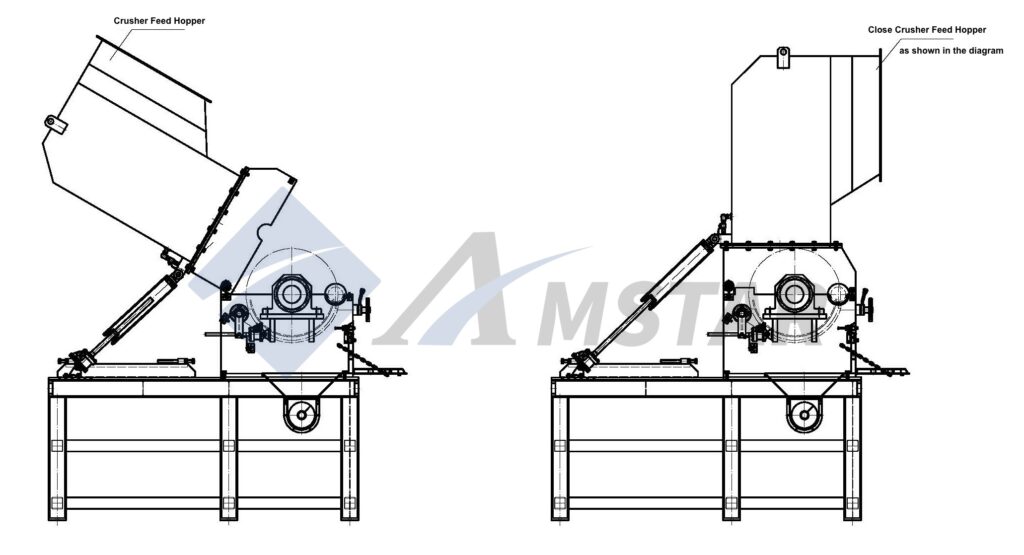
5. Close Granulator Feed Hopper
Once the blades are securely installed, close the feed hopper to complete the maintenance.
Action:
- Clean up any debris inside the Granulator chamber.
- Power on the electric box, set the manual/automatic switch to manual mode, and press the closing button to close the hopper.
- The hopper will close automatically when it reaches the closing limit switch.
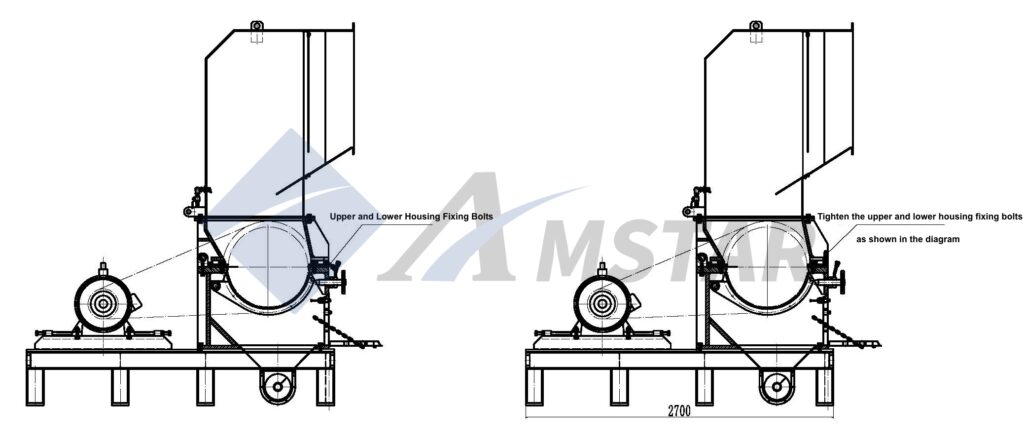

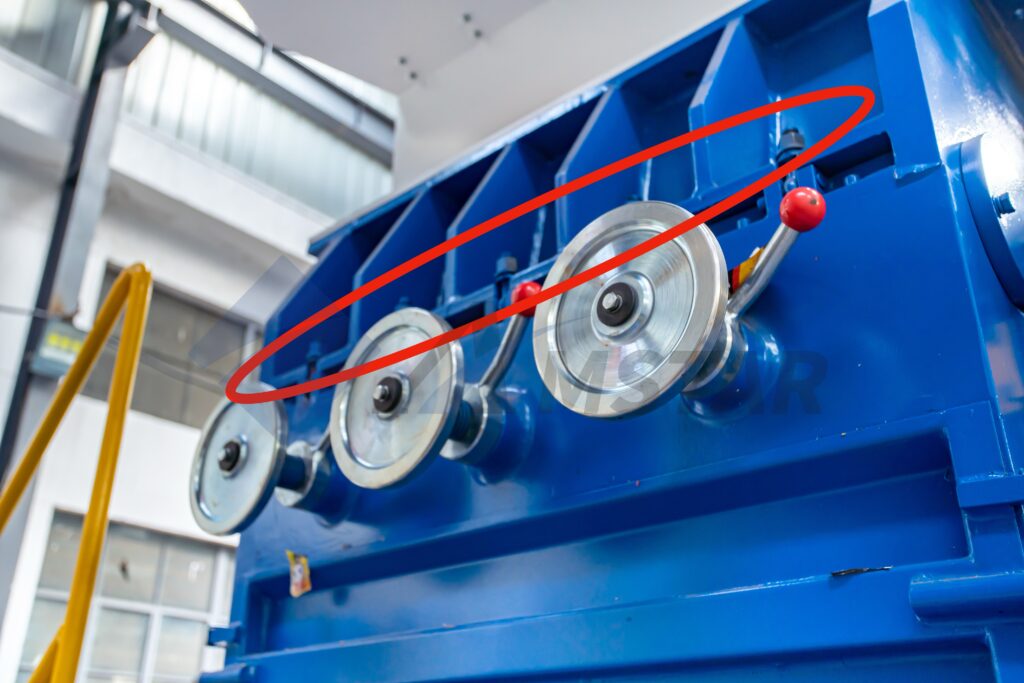
6. Tighten Upper and Lower Housing Fixing Bolts
The final step is securing the housing back in place.
Action: Tighten the upper and lower housing fixing bolts using the appropriate tools as shown in the diagram. This will ensure that the housing is securely fastened and the Granulator is ready for operation.
Conclusion
The blade replacement procedure for the SWHB1000 Granulator is designed to be straightforward but requires precision and attention to detail. By following this guide, you will ensure that the new blades are properly installed, contributing to the Granulator’s optimal performance and longevity.
For any technical support or inquiries about parts, please refer to the product manual or contact our customer service team.
INQUIRIES
To learn more about this product, please send us a message using the form below: